
Taking a server out of service for good is a deliberate, planned process. It's so much more than just yanking the power cord and network cable. A proper decommission of server hardware involves everything from migrating critical data and securely wiping the drives to the physical removal and environmentally sound disposal. Think of it less as a chore and more as a critical IT project that protects sensitive company data, keeps you on the right side of compliance laws, and even helps you recover some value from that retired gear.
Building Your Server Decommissioning Roadmap
A successful server decommissioning project kicks off long before anyone touches a single cable. It all starts with a solid, strategic roadmap. Trying to wing it with a generic checklist is a surefire way to miss critical dependencies, trigger unexpected outages, and create massive compliance headaches. A real roadmap does more than just list tasks; it connects the technical steps to your bigger business goals, turning a logistical headache into a well-managed initiative.
For IT leaders here in Metro Atlanta, this planning stage is a bit of a juggling act. You’re constantly balancing tight budgets, rigid hardware refresh cycles dictated by the finance department, and the absolute necessity of meeting data security regulations. A carefully crafted plan brings the clarity you need to handle these competing demands without dropping the ball.
Defining Scope and Mapping Dependencies
First things first: you have to clearly define the project's scope. Are we talking about a single, lonely application server? A full rack of gear? Or are you liquidating an entire small data center? The scale of the project really sets the tone for its complexity.
Once you know what you're dealing with, the most important task is to map out every single dependency.
For example, you can't just power down a database server. Its data has to be completely moved to a new system, and you have to validate that the migration was 100% successful. A web server might rely on a specific authentication server that's also on the chopping block. If you don't catch these connections upfront, you’re looking at service disruptions that can ripple across the entire organization.
A server decommissioning roadmap isn't just about the hardware; it's a strategic plan that maps the journey of your data from its current home to its new one, and ultimately, to its secure destruction. Getting this wrong can have significant operational and financial consequences.
A visual dependency map is your best friend here. It's a simple chart showing which servers, services, and applications lean on each other, making the correct sequence of events crystal clear.
Here’s a glimpse of what a high-level plan might look like in a typical project management tool:
This visual immediately shows that "Data Migration" has to be done before "System Shutdown" can even start. It highlights the critical path and stops different teams from accidentally working out of order and causing an outage that was completely preventable.
Assembling the Project Team
A server decommission is never a one-person show. It demands close collaboration across several departments to make sure everything goes off without a hitch. Getting key people on board early is crucial for avoiding bottlenecks and frustrating delays later on.
Your core team should have people from a few key areas:
- IT Operations: These are the folks on the ground doing the technical work—data migration, network configuration changes, and the actual physical removal of the hardware.
- Finance/Asset Management: They need to be in the loop to update inventory records, handle asset depreciation, and track any money you might get back from reselling the equipment.
- Security & Compliance: This team’s job is to oversee the data sanitization process and ensure every single step meets strict regulatory standards, whether it's HIPAA, SOX, or GDPR.
- Application Owners: These are the business stakeholders who actually use the services running on the server. They need to sign off on the migration's success and give the final green light for the shutdown.
When you lay out clear roles and responsibilities from day one, you build a system of accountability. Everyone knows what they're supposed to do, from the initial data backup to getting that final certificate of destruction in hand.
Of course, managing this entire lifecycle can be a huge undertaking. For organizations that need an expert partner to handle it all, professional data center decommissioning services can provide the specialized knowledge and resources to get the job done right. This collaborative approach ensures no stone is unturned, creating a seamless and defensible process from start to finish.
To give you a clearer picture, here’s a common breakdown of how these projects are structured.
Server Decommission Project Phases and Key Responsibilities
| Phase | Responsible Team | Typical Duration |
|---|---|---|
| Planning & Discovery | Project Manager, IT Ops, App Owners | 1-2 Weeks |
| Data Migration & Validation | IT Ops, Database Admins, App Owners | 1-4 Weeks |
| System Shutdown & Network Isolation | IT Operations, Network Team | 1-2 Days |
| Data Sanitization | Security & Compliance, IT Ops | 2-5 Days |
| Physical De-racking & Removal | On-site Technicians, Logistics Team | 1-3 Days |
| Asset Disposition & Reporting | Asset Management, Finance, Vendor | 1-2 Weeks |
This table provides a general framework, but remember that your specific timeline will depend on the complexity of your environment. Proper planning and clear communication between these teams are what make the difference between a smooth project and a chaotic one.
Choosing Your Data Sanitization Method
Once you've migrated your data, the real work begins. This is probably the most critical part of the entire server decommissioning process. Just hitting 'delete' or reformatting a drive won't cut it—not even close.
To truly protect your company, you have to make sure every last bit of sensitive information is gone for good. We're talking completely unrecoverable, leaving zero chance of a data breach from a server you thought was retired.
This is where data sanitization comes in. It’s a non-negotiable step for security and compliance. Your choice of method will come down to a few key things: how sensitive the data is, what your industry regulations demand (like HIPAA or GDPR), your budget, and whether you want to reuse or get rid of the drives for good.
This infographic can help you visualize that first big decision: whether to handle the project yourself or bring in a partner.
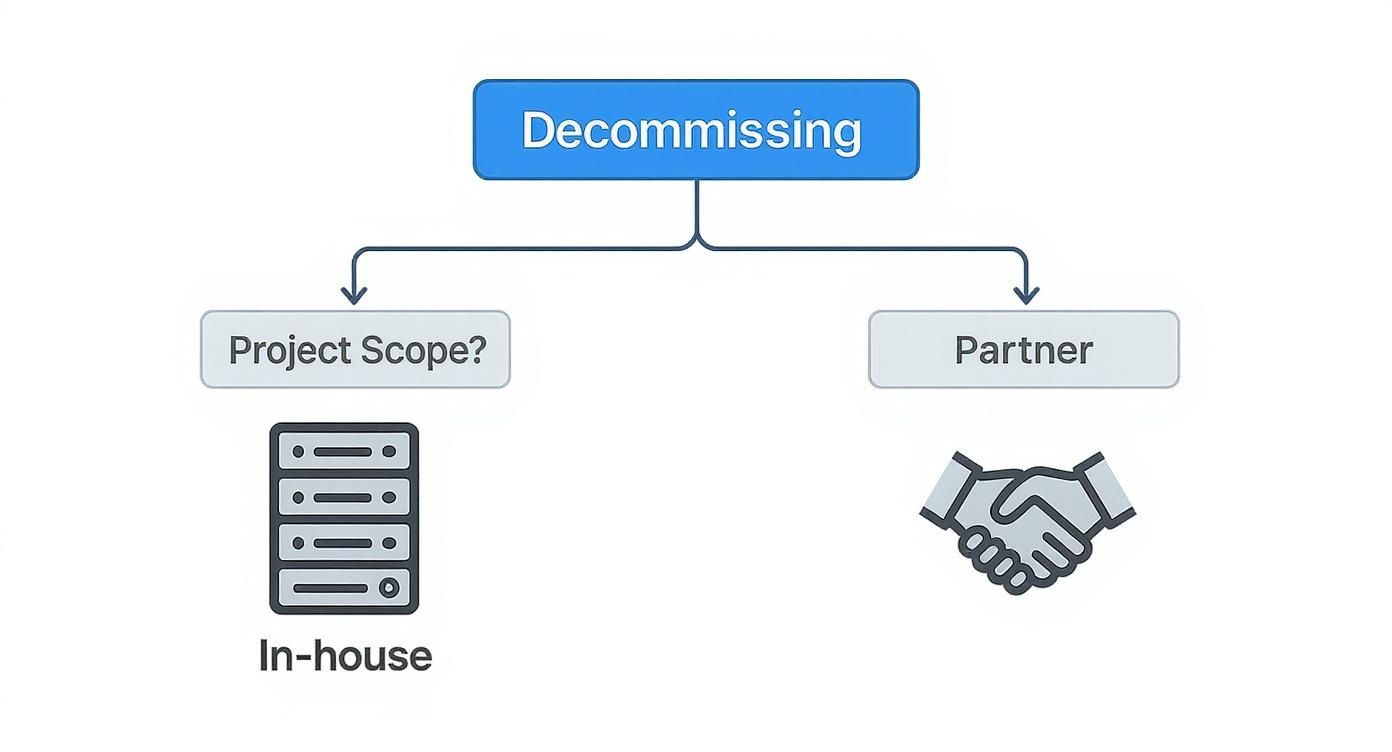
As you can see, the scope of your project is what really drives the decision, pointing you toward a self-managed or partnered approach based on how complex things are and the resources you have on hand.
Software-Based Wiping for Reuse
Software wiping is your best bet when you plan to reuse, resell, or return leased hard drives. It works by using specialized software to overwrite the entire drive with random data, essentially burying the original information so it can't be found.
The gold standard for years has been DoD 5220.22-M, which uses a three-pass overwrite. If you need even more security, there are more intense seven-pass methods, but be warned—they take a lot longer. Think of a financial institution in Metro Atlanta retiring a server full of customer records; they'll need a multi-pass wipe to stay compliant before sending those drives back to the leasing company.
The main advantage of software wiping is that it preserves the hardware. You keep the drive intact, which means you can get some of its value back through resale or by putting it to work somewhere else in your organization.
But this method isn't just "set it and forget it." You have to validate the process afterward. That means generating a certified report for every single drive to prove the wipe was successful. This certificate is a critical piece of your audit trail.
Physical Destruction for Ultimate Security
When the data is just too sensitive to take any chances—or when the drives are old, busted, or worthless—physical destruction is the only way to go. This approach guarantees the data is gone forever because the drive itself is obliterated.
There are two main ways to get this done:
- Shredding: This is exactly what it sounds like. An industrial shredder tears the hard drive and its platters into tiny, mangled pieces of metal. It's the go-to method for many healthcare and government agencies that need undeniable proof of destruction. On-site shredding, where a specialized truck comes right to your facility, offers the best chain-of-custody security you can get.
- Degaussing: This technique uses an incredibly powerful magnet to scramble the magnetic field on a drive's platters, instantly wiping the data. It's effective for traditional Hard Disk Drives (HDDs), but it's completely useless on Solid-State Drives (SSDs), which don't use magnetic storage. Degaussing also leaves the drive looking perfectly fine from the outside, which can cause headaches during an audit.
The demand for these secure services is absolutely booming. The global data center decommissioning market was valued at USD 89.35 billion and is expected to hit USD 95.67 billion, all thanks to the explosion of digital infrastructure. As more companies retire old gear, the need for secure, compliant disposal methods grows right along with it. You can explore a full market analysis on 360iResearch.
Data Wiping vs Physical Destruction Comparison
Deciding between software and physical methods can be tough. The right choice depends on your specific security needs, budget, and plans for the hardware. This table breaks down the key differences to help you decide.
| Method | Cost Per Drive | Average Duration | Compliance Level |
|---|---|---|---|
| DoD Wiping | Low | 2-8 hours | High (Certifiable) |
| Degaussing | Moderate | Seconds | High (HDDs only) |
| Shredding | High | Minutes | Absolute (Certifiable) |
As you can see, shredding offers the fastest and most secure outcome, but at the highest cost. Wiping is much more budget-friendly and allows for reuse, but it's a time-consuming process.
Choosing the right path is a strategic decision. A tech startup might use DoD wiping on newer servers to resell them, while a law firm will likely insist on shredding older drives containing confidential case files. No matter which you choose, the goal is the same: create an indisputable end to the data lifecycle, backed by a certificate that proves you did everything by the book.
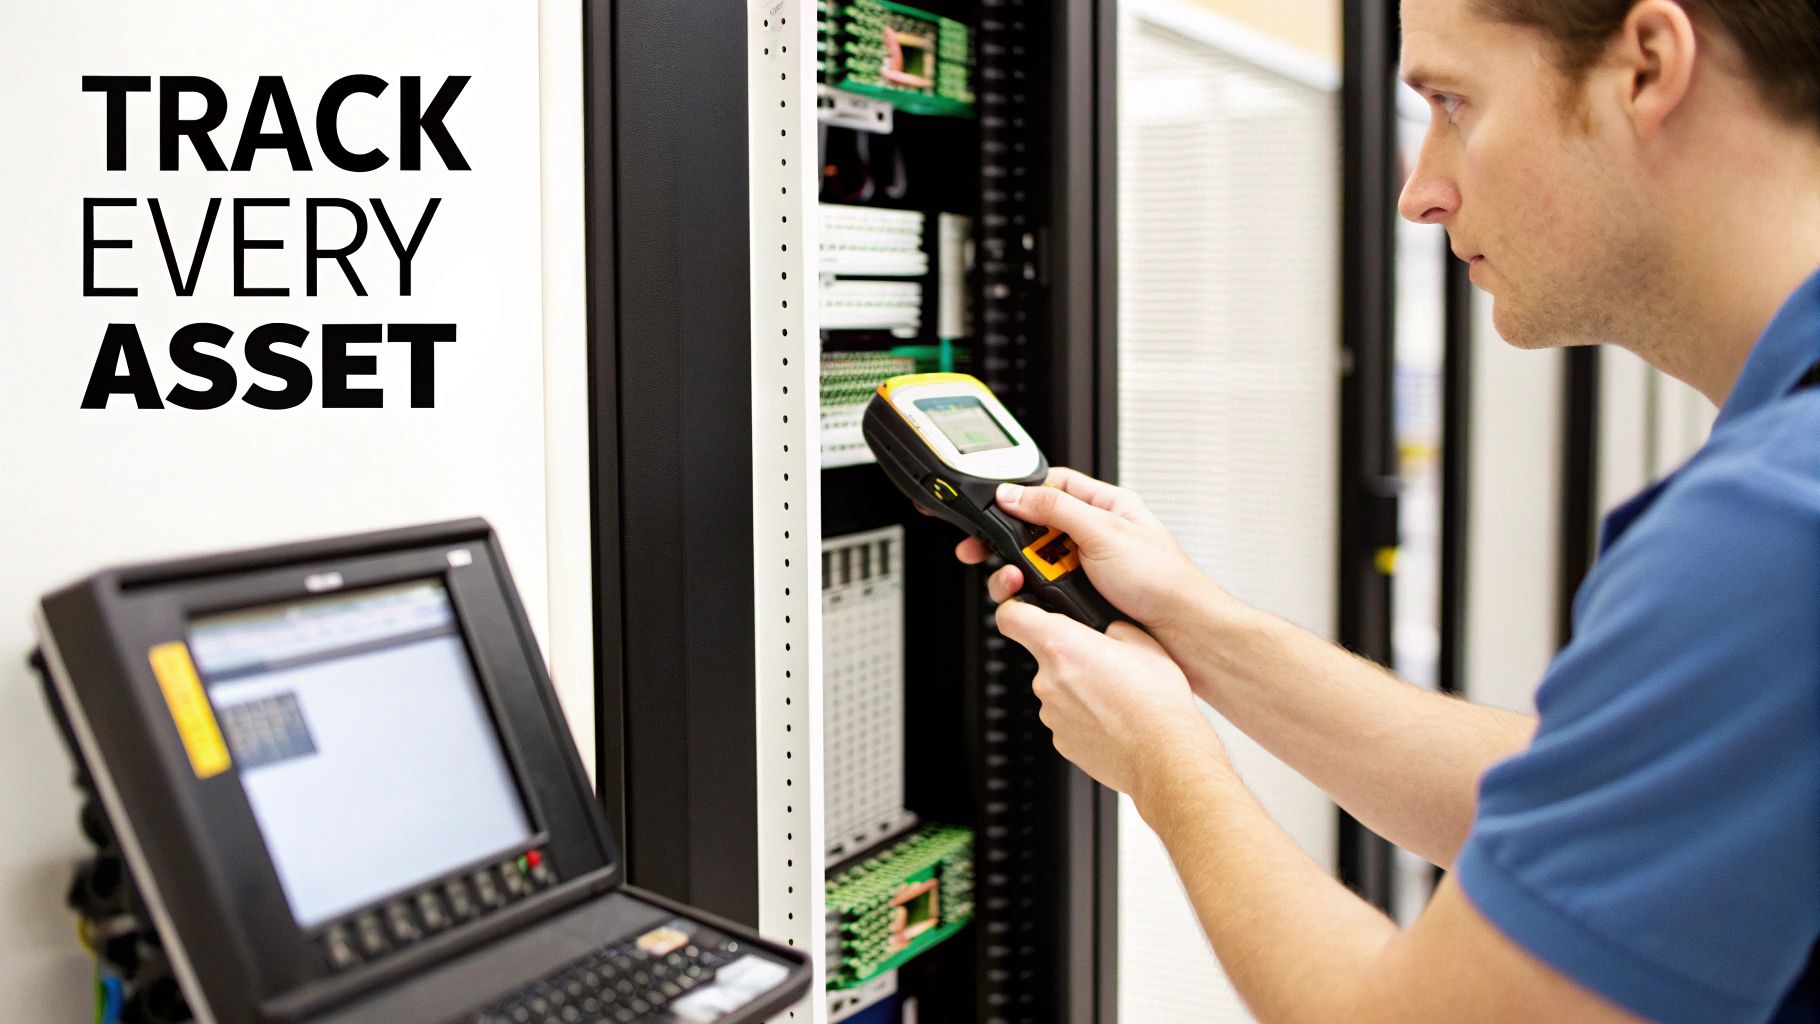
Mastering Asset Tracking and Inventory
A server decommissioning project lives and dies by one simple rule: you can’t secure, sanitize, or get rid of what you can’t track. It’s that basic. Without a rock-solid inventory system, a single forgotten hard drive can morph into a massive data breach or a compliance nightmare you’ll be explaining for months. Think of it this way: accurate asset tracking is the foundation of a defensible process. It creates an unbroken chain of custody from the second a server is unplugged to its final handshake with a recycler or shredder.
This whole process kicks off the moment a server is marked for retirement. Every single component that could possibly store data needs to be identified, tagged, and logged. We’re not just talking about the server chassis. I mean every individual hard drive (HDD), every single solid-state drive (SSD), and even network cards that have their own configurable memory. Skipping this step is like trying to balance your company’s books without knowing how many checks you’ve written—it’s a recipe for disaster.
Implementing a Tagging Strategy
The secret to effective tracking is a tagging strategy that’s consistent and dead simple to follow. It might feel like a small detail, but a durable asset tag is your first line of defense against equipment going rogue. For most businesses, standard barcode or QR code tags are the perfect starting point. They're cheap, easy to apply, and can be scanned at every step, automatically updating your inventory system as the asset moves along.
Now, if you're running a larger project or dealing with highly sensitive data, it’s worth looking into RFID (Radio-Frequency Identification) tags. Yes, they cost more upfront, but they allow you to scan a whole pallet of gear at once without needing a direct line of sight. This can shave hours, if not days, off inventory audits in your staging area.
Think of your asset tag as the device's passport. It should carry all the critical info needed to follow its journey: serial number, original rack location, and where it’s ultimately headed—be that resale, recycling, or the shredder.
This screenshot gives you an idea of a simple asset management dashboard. It provides a clean, at-a-glance view of all your tagged equipment.
This kind of central hub is a game-changer. It instantly shows which assets are queued for wiping versus which ones are cleared for disposal, which helps prevent a catastrophic mix-up.
Maintaining Your Asset Register
An asset tag is only as useful as the database behind it. Your asset register—which is often part of a bigger Configuration Management Database (CMDB)—is the absolute single source of truth for every piece of retired gear.
This register can’t be a static spreadsheet. It needs to be a living document, updated in real-time as assets move through the decommissioning workflow. Every entry must include, at a minimum:
- Unique Asset ID: The number that matches the physical tag.
- Device Details: Make, model, and serial numbers for the server and all of its drives.
- Chain of Custody Log: Dated entries showing who handled the asset and when, from the moment it leaves the rack to when it’s loaded on the truck.
- Sanitization Status: The exact method used (like a DoD wipe or physical shredding) and a link to the certificate of destruction.
- Final Disposition: The final outcome—recycled, resold, or destroyed—along with the date and the vendor who handled it.
Keeping this detailed log isn't optional; it's essential for compliance. When an auditor comes knocking, you’ll be able to pull up the complete history for any server in seconds, proving you followed a secure, documented, and defensible process. To get a deeper dive into building out a system like this, check out our guide on IT asset management best practices. By weaving these tracking methods into your project, you ensure no device ever falls through the cracks. It turns a logistical headache into a smooth, auditable, and secure operation.
Creating an Indisputable Audit Trail
When you’re decommissioning a server, the physical work is only half the battle. The other half—and arguably the more critical one—is proving you did everything by the book. A solid audit trail isn't just about ticking boxes for the compliance department; it's your ironclad proof that you protected sensitive data, followed protocol, and met every legal requirement.
Think of it as your get-out-of-jail-free card. This documentation is what stands between your organization and the kind of hefty fines, legal trouble, and reputation damage that a botched disposal can trigger. The paper trail has to start the moment the project gets the green light, with every document forming another link in an unbreakable chain of custody.
Assembling Your Core Documentation
Your audit file should tell a complete story. Anyone, from an internal compliance officer to a third-party auditor, should be able to pick it up and see the server's entire journey from the rack to its final resting place, with zero gaps or questions.
You'll want to start by gathering these foundational documents:
- Project Authorization Forms: This is your official starting gun. It's the signed approval from IT leadership, department heads, and business owners confirming the server is officially slated for retirement.
- Data Migration Validation Reports: You need proof that every last bit of necessary data was successfully moved off the old server. This isn't complete without a sign-off from the application or data owner.
- Chain-of-Custody Forms: This is a meticulous log tracking every single person who touches the server and its drives. It needs time-stamped signatures for every handoff, from the tech who pulls it from the rack to the ITAD vendor who drives it away.
These first few pieces establish intent and accountability, creating a strong foundation for everything that follows.
An audit trail is more than a checklist. It's a narrative that demonstrates due diligence. If it’s not written down, dated, and signed, for compliance purposes, it never happened.
Proving Data Destruction and Environmental Responsibility
Let's be honest: the most scrutinized part of any audit will always be the proof of data destruction. This is where your documentation has to be absolutely perfect. The goal is to provide undeniable evidence that sensitive information was permanently and irreversibly destroyed.
The cornerstone here is a serialized Certificate of Data Destruction. This isn't just a generic receipt. It’s a formal document attesting that the data on specific, identified hard drives (listed by serial number) was destroyed using a specific method, like a DoD 5220.22-M wipe or physical shredding. You can learn more about what a proper certificate of destruction needs to include to hold up under audit.
But data is only part of the equation. You also have to prove you handled the physical e-waste responsibly. Make sure your file includes:
- Asset Transfer Forms: The legal documents that officially transfer ownership of the hardware to your ITAD partner.
- Environmental Compliance Certificates: A statement from your recycling vendor confirming all e-waste was processed according to EPA standards and any other relevant federal, state, or local regulations.
- Settlement Reports: If any assets were resold, this report closes the financial loop. It details what was sold, the revenue generated, and any fees, completing the asset's lifecycle.
Tying this documentation back to specific regulations like HIPAA or GDPR is non-negotiable. For instance, under HIPAA, you must prove you protected electronic Protected Health Information (ePHI) throughout its entire life, including disposal. Your audit trail provides that concrete evidence, turning compliance from a vague idea into a verifiable fact.
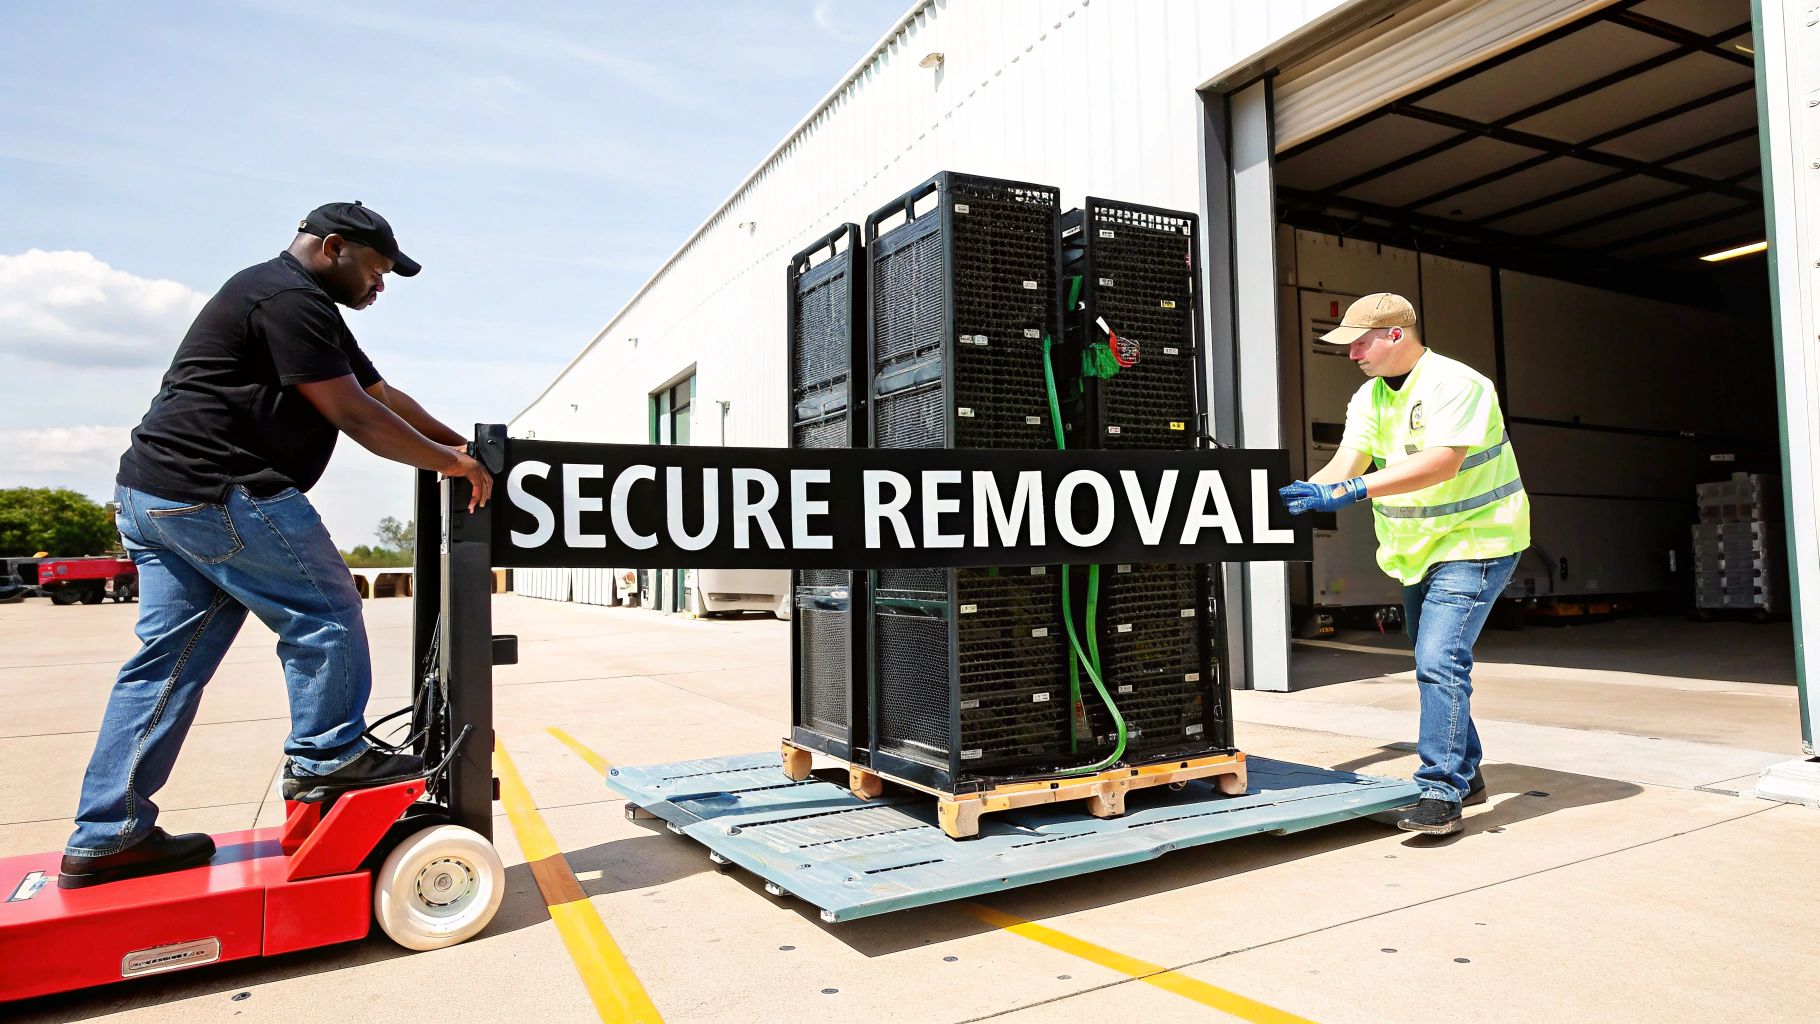
Handling Onsite Hardware Removal and Logistics
People often focus on the digital side of server decommissioning—migrating data, wiping drives, and so on. But I can tell you from experience, the project truly meets reality when it's time to physically pull old hardware out of a live data center. This is where a small misstep can cause a major headache.
Getting the physical removal right comes down to careful logistical planning. It’s about more than just brute force; it’s about de-racking and moving retired assets without disrupting the equipment that’s still running the business. One wrong move and you could block an aisle, create a safety hazard, or worse, accidentally knock a production server offline.
Coordinating with Facility Management
First things first: you need to get in touch with the data center’s facility management team. They hold the keys to the kingdom—controlling access to loading docks, freight elevators, and staging areas. You can't just roll up with a truck and start pulling gear.
Work with them to get your removal on the schedule, preferably during off-peak hours like evenings or weekends to keep disruption to a minimum. You'll need to confirm their exact requirements for entry, which usually includes security clearances for your crew and proof of insurance.
A classic mistake is underestimating how long it takes to get through security and navigate a massive facility. Always build extra time into your schedule for these small but significant delays.
When you’re dealing with heavy server racks or a large-scale decommission, safety is paramount. Using heavy lifting machinery requires following established forklift safety guidelines to protect both your people and the facility’s property.
Packing and Transporting Sensitive Assets
How you pack and move your old hardware, especially the hard drives, is incredibly important. Even a securely wiped drive needs to be protected. If it gets damaged in transit before final disposition is verified, your chain of custody is broken. Drives should always be packed in anti-static bags and secured in padded, hard-sided cases to prevent damage from drops or shocks.
Your choice of a logistics partner is just as critical. Make sure they are insured and bonded. This isn't just a suggestion; it's a necessity for managing risk. If a pallet of servers goes missing in an accident, your insurance coverage and the partner's documented chain of custody are your only lines of defense.
For businesses in Metro Atlanta, partnering with a local team that gets these complexities can make all the difference. Our expertise in professional IT asset removal guarantees a secure and smooth physical extraction from start to finish.
Phased Removal Strategy
If you're decommissioning multiple racks, trying to do it all at once is a recipe for chaos. The smartest play is a phased removal. This methodical approach keeps things organized and dramatically lowers the risk of mistakes.
Here's how a phased strategy works:
- Isolate and Tag: Clearly mark every server scheduled for removal in the current phase. Double-check your list.
- Sequential De-racking: Go rack by rack, or even server by server. Move each asset to a secure staging area and log it before you even touch the next one.
- Clear Pathways: Keep aisles and exit routes completely free of clutter, packing materials, and stray equipment.
This step-by-step process ensures the live environment stays stable and your asset tracking remains 100% accurate from the rack to the truck.
Deciding What's Next: Resale vs. Recycling
Once your servers are wiped clean and sitting on our truck, you've reached the final—and often most rewarding—part of the project: disposition. What you do next is critical. Will that old hardware turn into a surprise check for your IT budget, or will it become an environmental headache?
This last step in the decommission of server process boils down to two main paths. You can either resell the gear through an IT Asset Disposition (ITAD) partner or responsibly recycle it with a certified e-waste specialist. The right call balances financial return with your company’s security standards and green initiatives. A newer server packed with high-core CPUs or loads of RAM is a prime candidate for resale. But older, proprietary, or busted equipment? That’s headed straight for the recycling line.
Cashing In: Sizing Up Resale Potential with ITAD Partners
An IT Asset Disposition (ITAD) partner is your ticket to turning retired equipment into revenue. These are the folks who specialize in taking your old gear, sprucing it up, and finding it a new home on the secondary market. It's a fantastic way to recoup some of that initial investment, but you have to work with a partner who is transparent about how they value your hardware.
Here's what they're looking at:
- Age and Model: Servers under three to five years old are in the sweet spot and have the best resale value.
- Component Value: The real money is often in the parts—processors, RAM, and high-capacity drives are always in demand.
- Condition: It goes without saying, but equipment needs to be in good working and cosmetic shape to fetch a good price.
- Brand: Big names like Dell, HP, and Cisco have strong, established secondary markets, making them easier to sell.
A trustworthy ITAD vendor won’t just give you a single number. They'll provide a detailed settlement report that breaks down every component sold and what it earned. This transparency is non-negotiable for your financial records and audit trail.
This isn't a niche market, either. The global data center decommissioning service market is already valued at around $15 billion annually and it's still growing. This boom is fueled by companies like yours retiring old infrastructure and getting serious about secure, sustainable disposal. You can see more on these market trends on Market Report Analytics.
Doing it Right: Choosing Certified E-Waste Recycling
When servers are too old or specialized to be resold, you need to explore responsible e-waste recycling options. This isn’t just about dropping gear off somewhere and hoping for the best. Improperly disposed electronics can leak toxic materials like lead and mercury into the ground, leading to massive fines and a PR nightmare.
That's why you have to partner with a certified facility that follows strict environmental rules. Don't be shy about asking for their credentials.
Look for certifications like R2 (Responsible Recycling) or e-Stewards. These aren't just fancy logos; they are your guarantee that the recycler has a zero-landfill policy and maintains a secure chain of custody. Your equipment will be broken down into its base commodities—steel, aluminum, copper—in an environmentally safe way. They should also issue a Certificate of Recycling for your records, proving you've met EPA regulations and done your part.
Weighing Recycling vs Resale Outcomes
Choosing between resale and recycling involves weighing different outcomes for your bottom line, timeline, and environmental footprint. Each path offers distinct advantages depending on your project goals.
| Disposition Option | Environmental Impact | Revenue Potential | Processing Time |
|---|---|---|---|
| Recycling | High. Prevents landfill waste and recovers raw materials, directly supporting a circular economy. | Low to None. Typically a cost-for-service model, though some commodity recovery may offset fees. | Fast. Usually completed within days or weeks after pickup. |
| Resale (ITAD) | Very High. Extends the life of functional equipment, which is the most effective form of recycling. | Moderate to High. Can generate significant revenue from valuable components and systems. | Slower. Can take weeks or months to test, inventory, market, and sell assets. |
Ultimately, the right disposition path ensures your server decommissioning project wraps up securely, profitably, and responsibly, closing the loop on your asset's lifecycle.
Your Server Decommissioning Questions Answered
Even the most buttoned-up server decommissioning plan runs into questions. It’s just the nature of the beast. Getting the right answers ahead of time can be the difference between a smooth project and a costly, drawn-out headache.
Over the years, we’ve heard just about every question you can imagine from businesses here in Metro Atlanta. Here are some of the most common ones that pop up.
How Long Does Secure Data Wiping Really Take?
This is a big one. While physically shredding a hard drive is pretty much instant once the equipment is on-site, certified software wiping is a different story.
A multi-pass wipe that meets the DoD 5220.22-M standard can take several hours for a single drive. The exact time depends on the drive's size and speed. When you're talking about a full rack of servers, this step alone can easily eat up a few business days to get everything wiped, verified, and properly documented.
How Do We Prove Chain of Custody and Compliance?
Clients rightfully want to know how they can verify their assets were handled securely from start to finish. The answer is all about the paperwork.
Meticulous documentation is non-negotiable. Every single handoff—from your data center floor, to the truck, to the final processing facility—has to be logged on a chain-of-custody form. That means dated signatures at every step. Never let your assets leave the building without this process in place.
Another key piece is vetting your partners. When you're looking for an ITAD or recycling vendor, ask to see their certifications. Credentials like R2 (Responsible Recycling) or e-Stewards aren't just fancy logos; they are your proof that the company follows strict environmental and data security standards, including a zero-landfill policy.
If there's one mistake we see more than any other, it's incomplete asset tracking. Kicking off a project without a detailed inventory—tagging every single server and drive with a serial number—is a recipe for compliance gaps and, worse, potential data loss.
At the end of the day, a successful server decommissioning comes down to solid planning and asking these kinds of questions before you start. It’s the only way to make sure every step is secure, compliant, and fully accounted for.
Ready to take the complexity out of your next IT asset disposition project? The experts at Montclair Crew handle secure, compliant, and responsible server decommissioning and recycling for businesses all across Metro Atlanta. Contact us today for a seamless end-to-end solution.